Archive
Exploded Media Stand Design
I’m starting my masters in architecture program this week at Berkeley, so architectural drawings have been on my mind. Recently, I’ve seen various exploded diagrams, from architectural drawings to simple every day objects. These are used in the design field quite a lot to quickly show how various components relate to one another, and how the global piece is put together.
Here is another example of a real object, exploded:
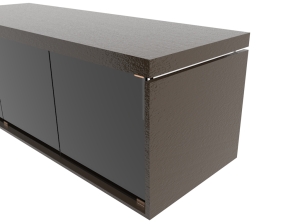
 This type of diagram is the inspiration behind my media stand design. It’s not entirely new – I’ve seen other works that mimic this exploded view, but I wanted it to be more subtle, just a little hint of the explosive nature of objects. Here are some renderings of an initial version.
The top/bottom and sides are set slightly off from the main enclosure.
Maybe this piece can be built with walnut too, or perhaps oak for a lighter look. I found some nice hinges from Sugatsune that I think would look real nice with the glass panels. The materials for this piece may be slightly expensive, given it’s size and style. Anybody want me to build this for them? 😉
Push-Car Finished, Problems Noted
Well, I finally finished the push-car, in time for my friends’ new addition (although the baby won’t be pushing anything for another 8-12 months other than poop). Here are some pictures:
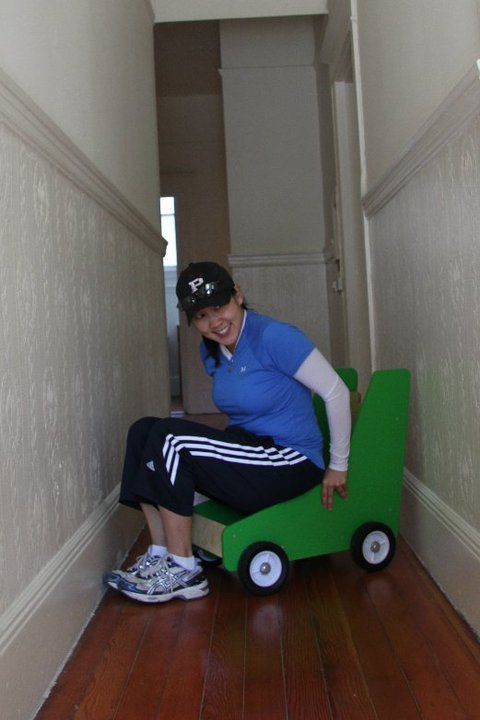
And here is my buddy Grace trying valiantly to fit in the car; luckily she did not break anything. I suppose that is some type of validation for the structural integrity of the piece.
Some construction details: for the paint job, I used 1 coat of grey primer with 2 coats of the bright green low/no-VOC paint (the actual color was Amazon or something). I think that worked out pretty well. I purchased the 6″ wheels from Discount Builders. They don’t have ball-bearings so don’t rotate super smoothly, but maybe that’s a good thing for a baby learning to walk. I used washers/bolt/nuts to attach the wheels to the car. This worked ok, but 1 wheel was slightly off-angled because I think the drill hole was not perfect. A drill press would most likely remedy that problem, but that’s why this blog is called “tight furniture” – ain’t no drill press gonna fit in my kitchen.
All the pieces were put together using counter-bored wood screws. It took a lot of eye-balling to align correctly; luckily no mistakes were made.
Some issues noted: first, the wheels may leave some marks. I tried and tried to source non-marking tires but couldn’t find any that would work without costing like $15/each wheel. Second, the design may be a bit top/back heavy. A baby may be able to pull the car down from behind if not careful. Therefore, I think the design needs to be tweaked a bit, or else the push car should only be used by older kids who are taller than the push-car, maybe 2-3 year olds.
Overall, though, I am happy with the finished product, but the rounding/router work was a real pain. I think my lazy personality prefers simple plain lines and orthogonal joints.
Bought My First Router
I recently purchased my very first router, mainly for doing the rounded corners on my push-car design. I also hope to start doing dovetail joints in the future, maybe for my next project. I headed over to my local Woodcraft store because I saw that they had some specials recently. Initially, I was thinking of purchasing the Festool router because, well, I’m just a sucker for German engineering. But it was too expensive in the end, so I decided to go with the Porter-Cable 895PK, which comes with both fixed base and plunge base parts. The store clerk who was helping me said that he loves his Festool router but for a first router, the Porter-Cable is the way to go.
 This system is pretty nice too. The router motor can be removed from either base, allowing you to easily switch between fixed and plunge base routing. The fixed base mode, however, does not have dust extraction, which is kind of a real bummer, especially when you’re doing woodworking in your kitchen. Also, I got the fixed base with the larger/longer L handle – based on my tests so far, it gives you much better control.
Toddler Push-Car Design
I saw this toddler push-car at a friend’s house recently and it looked neat. Their 11-month old, who is learning how to walk, was pushing it around and it looked fun for the little guy. Since I have some other friends who are having a baby soon, I decided to design my own and build it for them.
I decided that I would do this in Baltic birch plywood. I am anticipating that the rounded corners will be a little difficult and will require a new tool – the router. And since this is for a little kid, I’ll need to make sure that everything is child-safe and non-toxic.
Cantilever Coffee Table – Finished!
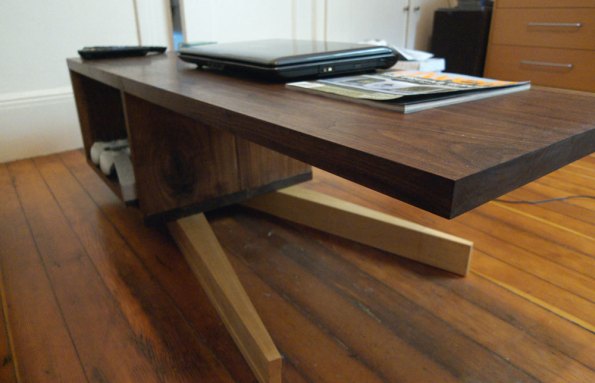
The coffee table is finally finished after about a week of applying the various oil and wax coats. It took a bit longer than expected because I had knee surgery during that time, and couldn’t move around too well.
Here’s another view from the front.
Finishing my Cantilever Coffee Table
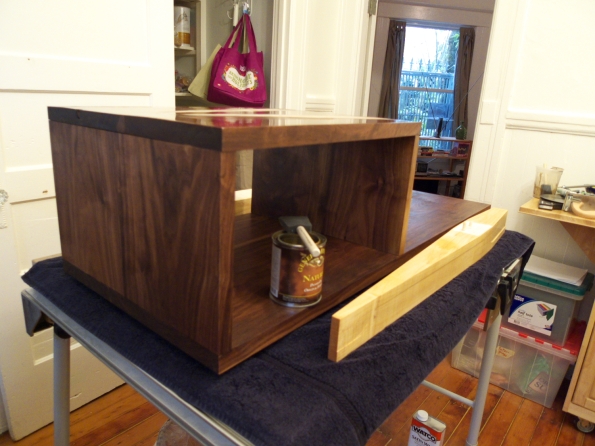
So I purchased all my wood (from Earth Source Wood and MacBeath in San Francisco) and set to work putting together my cantilever coffee table. I had no major problems using my new Festool plunge saw and multi-function table to piece together the table top. The planing was a learning experience though (see my previous post). All in all, I was happy with my end result.
So the next step was putting a finish on the walnut and poplar. I found this great guide online on how to apply oil finishes: http://www.wwch.org/Technique/Finishes/OilFin.htm. It explains that the object of finishing is: 1) Seal the wood; 2) Fill open pores and grain; and 3) Make it lustrous, without a notable surface film. It then goes on to give step-by-step instructions on how to apply an oil finish and a wax coat. I basically followed these instructions in finishing my coffee table.
Instead of using the Watco danish oil, however, I used General Finishes danish oil natural. A pint was all I needed. I did use the Watco Satin Wax (dark for the walnut and natural for the poplar) and it definitely leaves a nice final polish.
All in all, I was very satisfied with the finish.
Sharpening Tools
New hand planes necessitate sharpening tools – yes, the purchases never end. So back to the shop I went to pick up a waterstone and a diamond stone. I purchased a “#1000/#6000 grit Large Combination Water Stone” by King and a #300 grit Suehiro diamond stone.
I didn’t purchase a honing guide though, because I was told that it isn’t too difficult to hand sharpen the planes. I tried it a couple times, and it seems to work ok, but it takes care to maintain the proper angle without such aids.
One major problem I seem to have is that when using my planes, I get ridges and valleys in between strokes. These then require sanding to be removed. I have been told, though, that a piece of wood can “gleam” if it is only planed and not sanded. I guess I need to improve my planing technique. I think one way is to give the plane edge a slight rounded curve when sharpening. This could help prevent the plan from digging and ripping into the wood when planing. Perhaps a honing guide would help with this type of sharpening. Any ideas?
Essential Hand Planes
Since I don’t have a jointer or planer, I decided that I better invest in some decent hand planes. I went to my neighborhood woodworking shop, Japan Woodworker, and picked up two BORG hand planes. They had special ordered these planes from BORG, and they were of good quality but much more affordable compared to the Clifton hand planes. I purchased both a smooth plane and a jack plane.
I considered trying the Japanese hand planes instead of traditional western planes. The Japanese planes felt great in the hands, and pulling, instead of pushing the plane, felt much more natural and comfortable. But the Japanese planes seemed to require more set-up so in the end, I opted for the traditional planes.
Every Workshop Needs a Workbench
I recently purchased the next item on my wish-list, a Festool MFT/3 workbench. It is, again, expensive but given it’s utility and size, I think it will be a good addition to my kitchen workshop.
One potential issue with this product is that to cut long boards you will likely have to purchase a second extension MFT table to extend beyond the base MFT/3’s 45 9/16″ – (which will obviously cost even more). What I do like about this table is that it has legs that can fold in, which makes storing it slightly easier. Also notice the CNC milled table top holes – these are so precise that you can very easily square your cuts with the cheap addition of a pair of Qwas dogs and a pair of the rail dogs. You can find these at http://qwasproducts.com.
 Here is a picture of the rail dogs attached underneath the Festool guide. Insert the other pair of Qwas dogs in a perpendicular fashion to the rail, push your wood to be cut against these dogs, and you’ve got yourself a perfect 90 degree cut. Check out this “Using the Rail Dogs” video on YouTube if you have a minute. The guy’s accent is awesome and his straight-forwardness is incredible:
Festool Tools Have Arrived!
 One problem with working in my kitchen is that I am severely limited in space. A normal table saw by itself would essentially eat up the entire square footage available to me. And my wife would kill me.
In researching good alternatives, I came across this post from This Old House online. It recommended a Festool TS-55 circular saw system. Although expensive (around $500!), it would save a ton of space.
After watching Festool’s catchy video a ton of times, I decided to take the plunge and buy the saw+vacuum (CT MIDI dust extractor) combo from McFeely’s for $805. I had looked on craigslist for several weeks and all the Festool listings were essentially the same price as new.
 I tested out the saw, cross cutting and ripping a few scrap pieces of wood. It works like a charm! There are a few issues already though. First, I’m going to have to come up with a better work table. Second, the guide rail is only 55″, which means I’m going to have to buy a second rail for long rips. Also, it seems that the auto setting on the dust extractor doesn’t always work. For many cuts, I was forced to set it to “manual”. But all in all, the dust extractor works great, and greatly reduces the chance of eating saw dust in my food.
![05 nama exploded axo [Converted]](https://tightfurniture.files.wordpress.com/2010/08/2032458018_15-axo-diagram.jpg?w=595)

